Tuesday, November 25, 2008

Osprey Modelling Manuals 9 Modelling WWII Figures


This highly detailed figure, modelled by Diego F. Fortes, is made of resin and is intended to be adaptable to the Messerschmitt Bf109G and 109E by Revell, the Focke-Wulf Fw190A by Hasegawa and the Bf109E by Matchbox, all at 1/32 scale. The outfit is typical of those worn by German pilots during the final stages of World War II. The famous Kanal Hoses (channel trousers) are the most distinctive article of clothing; the name is based on the fact that these trousers were distributed among flight personnel working on operations over the English Channel in 1941.


Download (depositfiles.com)

Scal Aircraft Modelling - Combat Colours 01 - the Messerschmitt Bf-109E


At this stage, it might be appropriate to consider the structure of the Luftwaffe single-engine fighter force, Jagdverbande, at operational level, because the colour schemes that were carried hinge upon this area.
The basic Luftwaffe tactical operational unit was the Geschwader -broadly equivalent to an RAF Group. The Fighter Geschwader, ie Jagdgeschwader, abbreviated to JG, consisted of three Gruppen (Wings), which in turn was made up of three Staffeln (Squadrons). Some Geschwadem, especially towards the end of the Battle of Britain, added a fourth Staffel to some of its Gruppen, which caused some re-adjustments in the Staffel numbering procedure, (as might be deduced from the accompanying table).


Download (depositfiles.com)

Scal Aircraft Modelling - Combat Colours 03 - the Curtiss P-36 & P-40


The origin of the Curtis P-36 and P-40 series lies in an Army Air Corps Specification issued in 1934 calling for a fighter of all metal, low wing design which was to have a top speed of 300mph. Armament was to consist of two machine guns, one of 0.30 inch and one of 0.50 inch calibre. In all, five companies, including Curtiss, tendered designs to this specification and the Curtiss submission, known at this time as the Curtiss Model 75, flew for the first time in mid-April 1935. Over the next year or so all the firms tendering submissions to this specification ran into trouble of one sort or another, and ultimately the Seversky submission was accepted by the Air Corps and put into production as the P-35A. As a 'consolation prize' for being judged second, Curtiss was awarded a production contract for three Curtiss 75Bs powered by the Pratt and Whitney R-1830 Twin Wasp radial engine to be used as service test aircraft.

Download (depositfiles.com)

TodoModelismo 008


A la nueva versión designada 8K14 se le instaló un nuevo sistema de inyección de queroseno y ácido nítrico y se le dotó de un grupo giroscópico asociado a un guiado inercial. lo que mejoró notablemente la precisión. Otra innovación fue que la cabeza del misil se desprendía del cuerpo en la fase última de la trayectoria, evitando de este modo el lastre aerodinámico de los largos depósitos. El diámetro siguió siendo de 0,8 m. pero la longitud se aumentó hasta (os 1.16 m. Como se incrementó la capacidad de combustible, el alcance máximo creció hasta 300 km y el mínimo quedó en 50 km. El límite de desviación y de flexión sobre el blanco varía de 180 m a 610 m en su longitud y de 100 m a 350 m en su anchura. El tiempo de vuelo oscila entre 165 y 313 s.


Download (depositfiles.com)

TodoModelismo 009


Por su parte, el Grupo Mecanizado Anfibio está conformado en relación a tres compañías, una de las cuales es de carros y otra de anfibios de cadenas. En la de carros se incluye una sección provista de 16 carros medios M-48A3. otra constituida con 17 carros ligeros Skorpion y un carro de recuperación M-88E. mientras que en la compañía de anfibios de cadenas se agrupan 19 blindados del tipo LVT.
Los carros medios M-48A3 son el resultado de una modernización efectuada por la empresa Talbot durante los años setenta para incrementar la movilidad de los M-48 originales que llegaron de Estados Unidos.


Download (depositfiles.com)

Modeling the FA 18 Hornet


The modelling evolution of the F/A-18 Hornet and, more recently the F/A-18E/F Super Hornet, has been slow. Hasegawa and Revell both produced large 1/32-scale models of the Hornet prototype or early production aircraft. These are long-since gone and rarely available now, and were sparsely detailed. For many years, modellers felt frustrated by the lack of a well-produced model in any scale. Now everything has changed. Suddenly, it seems, we have or are about to see state of the art kit releases in all the major scales addressing the major operational versions of the F/A-18A/B, C/D Hornet or F/A-18E/F Super Hornet. A full summary of the scale models currently available at the time of going to press is included later in this book.


Download (depositfiles.com)

Modelaid 23


In 1954 the Northrop Aircraft Co. became aware, as a result of its studies for a lightweight low-cost fighter, of a new range of small, high thrust-to- weight ratio turbojets which were being developed by General Electric. Although these turbojets were being developed for missile application, Northrop recognised their potential for use in manned combat aircraft By strange coincidence such aircraft was already under study and designer Welko Gasich soon produced a preliminary design for a small supersonic fighter powered by a pair of small turbojets. The project was christened "Tally Ho".

Modelaid 03


The application of the Schema Mim-tico a Reticolo is rather unique. Whereas on most mottled finishes one finds that a base colour is used over which different coloured mottles are sprayed, the method used in this scheme was reversed. The Giallo mimetico was first sprayed evenly over the uppersurfaces first, the other two colours being sprayed over lo form a net which leaves the base colour in the shape of mottles. The design, applied by hand, differed considerably from aircraft to aircraft, depending on the ability and artistry of the painter. Photographs of the period fully confirm the introduction on wide scale of Reticolo scheme, sometimes with sparse and sometimes with dense effects.

Modelaid 02


Italy became involved in the Spanish Civil War on the 28th July 1936 when nine SM.8ls arrived in Morocco, followed by CR.32s in August. Apart from providing an ideal proving ground for the Regia Aeronautical latest aircraft and operational tactics, it was also an opportunity to experiment new camouflage techniques in a hostile environment. The alluminium finished CR.32s soon started to sport camouflage schemes, which without any doubt were improvised on the field. The units had very limited means at their disposal, and, most important of all, a completely free hand. This does not mean that there was any lack of interest in the aircraft camouflage: in fact we will see later how the results obtained in Spain were backed by the blessing of the Stato Maggiore of the Regia Aeronautica.

Replic No.098


La documentation sur le Lysander est à ce point rare que la sortie de ce petit livre d'une quarantaine de pages à peine est une véritable aubaine. Les trois première pages résument l'histoire du monomoteur et décrit les principales versions et leurs caractéristiques techniques. Ce texte est accompagné d'un tableau récapitulant les types, numéros de série, unités, nombres construits, etc. Puis, vient une belle suite de photos d'époque montrant différents camouflages et marquages.. avec des légendes informatives. Quelques vues de détails (moteur, cellule, intérieur) donnent également un bon aperçu de la conception de l'appareil, ces clichés étant complétés par quelques pages en couleur sur des machines restaurées (cockpit, détails externes, etc.).


Download (depositfiles.com)

Replic No.064


Nous avons l'occasion de voir sur la page précédente de nombreux détails intérieurs d'un TBM-1 C qui diffèrent légèrement avec ceux du TBM-3 présentés dans notre n°51. 11. Une vue rapprochée d'un TBM-3 préservé aux Etats-Unis qui met en évidence l'aspect riveté du revêtement, un détail de surface particulièrement bien traité sur la maquette Accurate Miniatures. 12 à 16. Rare photo d'une tourelle démontée qui nous dévoile son installation complète. Notez le rail circulaire, la poignée de tir décalée devant le petit pare-brise blindé. 16. Cette vue de dessus nous montre que l'accès au siège de la tourelle n'est pas des plus larges, puisque le tireur passait par-dessous. 17. Sur cette vue intérieure on voit le dessous de la tourelle dorsale et la fenêtre de la soute de l'Avenger.


Download (depositfiles.com)

Replic No.090


En septembre 1944, Yakovlev modifie un Yak-3 en le dotant d'un moteur VK-105PD de 1350 ch au décollage. En février suivant, un autre Yak-3 est nanti d'un moteur VK-1G5PV de 1240 ch au décollage, assisté d'un compresseur à deux étages et deux vitesses. Tous deux sont communément désignés Yak-3PD et sont testés pour l'interception haute altitude. L'envergure de leur aile est plus longue de 60 cm et l'armement ne comprend qu'un canon axial NS-23 de 23 mm avec 60 obus. L'hélice est une tripale métaIIiqueVICh-105TL-2. Les entrées d'air à l'emplanture de la voilure ne sont pas cloisonnées, une écope sous le capot est visible et divers équipements sont installés. Les essais des deux prototypes au LU (Institut de Recheches en Vol) sont menés jusqu'au milieu de l'été 1945 avec satisfaction, mais la fin de la guerre en Europe rend inutile un appareil de ce type pour équiper les VVS.


Download (depositfiles.com)

Encyclopedia of Military Models


The recognition models (or identification models) are officially provided by governments to military schools in charge of courses on aircraft identification. As an example, the first recognition models of the US Navy were produced by the workshops of the Bureau of Aeronautics, Special Devices Division. These models are well-suited lo their function as they are correct in shape but lack details. These details are usually unknown on enemy aircraft, and anyway are useless for their training purpose. The designers of recognition models often work from pictures of aircraft in flight, and sometimes refer to the head of pilots for scaling the dimensions of the enemy planes. When manufactured, recognition models are identified by a serial number and sometimes an index containing updated information obtained on the type of aircraft. Any army of importance has its recognition models, but the largest range is deemed to be manufactured by the specialised concerns of the K.G.B. The model shown on the right was made by Setco.


Download (depositfiles.com)

Replic No.088


La décoration choisie est une de celles de la boîte correspondant à l'appareil du Colonel Tex Hill du 26th IIS., 51st FG, camouflé olive drab et neutral grey. Les décalques du kit conviennent parfaitement, après élimination du film transparent autour de chaque motif. Les couleurs sont bien denses et la pose est parfaite. Une couche de peinture aluminium sera vaporisée préalablement aux teintes du camouflage, afin de pouvoir figurer les éraillures assez visibles, d'après les clichés d'époque concernant cet appareil particulier Les nourrices alaires sont aluminium et les lance-roquettes vert olive. La casserole d'hélice est rouge. Les pales d'hélice trop courtes, méritent d'être remplacées.


Download (depositfiles.com)

Replic No.086


Bien que correctement aménagé tel quel, j'ai décidé d'améliorer le cockpit afin de pouvoir la présenter . Le siège du pilote sera monté conformément à la notice de même que les palonniers. Par contre, pour le manche à balai, j'ai pris celui du modèle Smer beaucoup plus réaliste, agrémente de la jolie pièce en photodécou-pc de la boîte Ecluard et de quelques autres détails. La console gauche n'étant pas très ressemblante, je l'ai remplacée par celle de Smer. Le tableau de bord avec son film sont parfaits et se placent blen. ll sera peint en aluminium ou laissé tel quel, vu qu'il est déjà chromé. Sur la notice, la pièce PE17 est à coller en bas à droite de la planche de bord avec son film, ce dernit;r étant faussement prévu pour la pièce PE 11. Les détails des flancs internes des postes du pilote et du mitrailleur proviennent d'un kit d'amélioration en résine de la marque Russe Neomega. Tout l'intérieur du cockpit sera peint en gris clair (Humbrol 162) conformément à la notice.


Download (depositfiles.com)

Replic No.085


Les moteurs en étoile Pratt & Whitney R-2S00 demandant beaucoup d'heures de maintenance que des turbopropulscurs., il fut naturellement envisagé de changer la motorisation du plus célèbre des bombardiers d'eau. le CL-215. En outre, les turbopropulscurs offrent une souplesse d'utilisation et entrainent une hélice quadripale de près de 4 mètres de diamètre. Les premières études de cette nouvelle option commencèrent en 1985 et en 1988 un premier modèle fut montré à Farnborough. Initialement baptisé CL-215 T, car la cellule du CL-214 servait de base à cette remotorisa-tion, nous connaissons aujourd'hui ce bimoteur sous l'appellation CL-415.


Download (depositfiles.com)

Replic No.082


L'anneau frontal du capot-moteur est en fait le collecteur d'échappement. Sur les photos en gros plan on peut voir les pipes qui viennent de chaque cylindre et se raccordent sur la couronne. Pour réaliser ce détail, il semble plus facile de charger au mastic l'intérieur de la lèvre ou d'y coller un anneau pour figurer la couronne, puis de placer les pipes vers les cylindres. Il ne faut pas oublier également les tiges de maintien fixées sur l'extrémité du carter du réducteur, juste derrière l'hélice. Les grosses prises d'air situées à l'extérieur de chaque nacelle sont parfaitement rendues, légèrement décalées vers le bas. On peut envisager de les évider. mais une simple mise en peinture peut suffire.


Download (depositfiles.com)

Replic No.083


Pour la maquette Pro-Modeler/Revell. Près de 130 pièces réparties sur deux planches nous permettent de reproduire un poste de pilotage quasi-complet dans lequel, seul le manche à balai n'est pas inclus. Ensemble plancher/cloisons latérales, siège et harnais, tableau de bord et paion-nier, boîtiers et commandes latérales, repose-pieds, manettes. Le train d'atterrissage n'est pas oublié avec des éléments de portes de train, les compas d'amortisseurs, les cloisons pour les logements, la jante de la roulette de queue, etc. Marche-pieds, rétroviseur, clapets du système d'évacuation d'air du turbo-compresseur, ailettes pour deux tombes et pour dix roquettes, ainsi que l'orifice arrière de propulsion de ces dernières, complètent l'ensemble.


Download (depositfiles.com)

Modelling the P-47 Thunderbolt


There is a wide selection of 1/72-scale P-47 Thunderbolt kits available at the time of writing (2004). Several of these are truly excellent, while others are older moulds that no longer meet the high expectations of today's modellers. In this special supplement to Osprey Modelling 11: Modelling the P-47 Thunderbolt, we will examine the most commonly available mainstream Thunderbolt kits in 1/72 scale. The superb new Tamiya P-47D is the subject of an illustrated construction article (starting on page 14), and assembly of the Revell P-47M is also covered. The associated book, available from Osprey Publishing, contains historical background, a description of P-47 variants, a colour reference chart and a detailed listing of further reading and websites in addition to seven construction articles covering all the main Thunderbolt production variants in 1/48 scale. The aim of this supplement is to bring the content of the book up to the minute with the most recent releases in 1/72 scale.


Download (depositfiles.com)

Replic No.080


Les auteurs de ce nouveau livre de la série Squadron/Signal ont déjà eu l'occasion de nous faire part de leurs connaissances et de nous faire profiter de leur collection de photos d'époque, notamment lors de leur participation aux livres de la collection Tietoteos il y a une vingtaine d'années. Nous retrouvons dans ces pages l'historique de l'armée de l'air finlandaise durant la Seconde Guerre mondiale après un très bref rappel sur l'arrivée des premières machines au début du siècle. Le texte commence par nous remémorer la situation, puis aborde plus en détails la guerre de l'hiver 1939-40. Viennent ensuite d'autres chapitres sur les années 40-41, 42-43. et enfin les derniers jours de conflit début 1944.


Download (depositfiles.com)

Replic No.081


Les 18 pièces en résine gris clair de cette boîte vous permettent de réaliser trois personnages au l/48e représentant des mécaniciens de la Lutt-waffe en période d'été. La découpe de chacune avec les bras, les jambes, les têtes, les torses, et les chaussures séparées, autorise des poses différentes. Deux personnages sont torse nu avec des shorts, et la troisième figurine est revêtue d'un pantalon et d'un tricot à manches courtes. Une tête supplémentaire coiffée d'une casquette, plutôt américaine, est fournie. Le moulage est excellent et les détails très fins. Toutefois suggérons au fabricant de ne pas systématiser les têtes aux formes allongées. Vivement recommandé aux amateurs de diorama.


Download (depositfiles.com)

Replic No.078


Plus de 150 photos en grande partie en couleur, nous montrent tous les détails intéressants de l'avion : habitacle, postes de tir, soute à bombes, moteurs, trains d'atterrissage, armement, etc.. Si la plupart des vues proviennent d'avions restaurés et préservés, une trentaine sont des photos historiques illustrant la carrière opérationnelle du B-25, entre 1942 et 1945. A cela s'ajoute une quarantaine de plans et dessins techniques montrant avec clarté toutes les différences entre chaque version de l'appareil et aussi quelques équipements internes. Enfin, une douzaine de profils en couleur vient parachever ce livre-photoscope particulièrement utile aux maquettistes.


Download (depositfiles.com)

Replic No.079


Plus de 150 pièces réparties sur deux planches soni fournies dans cette pochette, destinée au Douglas SBD-5 de Accurate Miniatures au l/48e. Notons que bien des éléments conviennent aussi pour la version du SBD-3. L'une des planches comporte de quoi réaliser les volets perforés, les ailettes des bombes, les petits lance-bombes d'ailes, plus les antennes radar Yagi. L'autre planche, permet de détailler le moteur avec la couronne des fils d'allumage et les tiges des culbuteurs, la grille et le volet du radiateur placé sous le capot, les volets de capot et quelques pièces pour le train d'atterrissage L'habitacle n'est pas oublié : siège baquet, harnais, manettes, palon-nier, tableau de bord, détails des culasses des mitrailleuses de capot, et pour le poste de tir arrière, plaque de blindage, bandes à munitions, rail perforé semi-circulaire, viseur, etc. Avec le niveau de détails déjà présent sur le modèle Accurate, le moindre équipement de l'avion peut être reproduit.


Download (depositfiles.com)

Replic No.076


Le 10 janvier 1912, pour le première fois un avion britannique décolla à partir d'un navire de guerre. I.e 13 mai de la même année la Royal Naval Air Service (l'aéronavale britannique), était créé. À la veille de la Première-Guerre mondiale, en août 1914, cette arme alignait 71 avions. Quand en avril 191 S. la RNAS fusionna avec le Royal Flying Corp pour former la Royal Air Force. Il disposait alors de : 2950 appareils, 103 dirigeables, 67000 hommes et 126 bases aérienne. De la défense aérienne de la Crande-retâgne aux combats Méditerranée et au Dardanelles, des patrouilles antisous-marines aux attaques contre les bases allemandes, le RNAS s'illustra sur tous les fronts pendant les quatre années de la Grande Guerre. L'histoire de ses équipages et de ses avions nous est racontée dans ce beau livre qui. sans être exhaustif, nous apporte les faits les plus importants et les actions au cours desquelles se distingua le RNAS.


Download (depositfiles.com)

Replic No.077


Pour le plus connu des avions japonais voici un set de détaillage en résine accompagné de pièces en métal photodécoupé. Les parois du cockpit sont figurées avec les renforts, les panneaux d'instruments et les câbles de connection qui courent de ces divers équipements. Le plancher est moulé avec les repose-pieds, l'axe du manche à balai, et quelques autres petits détails. Le siège avec son dossier perforé est également fourni en résine. En photodécoupe nous trouvons la planche de bord avec les cadrans imprimés sur un rhodoïd, les couples cloisons derrière le siège du pilote, des ensembles de manettes avec leurs supports à confectionner en plusieurs éléments, et même la chaîne de la commande de trim... Ce n'est qu'une partie de tous les détails que vous pourrez installer dans toute maquette du Zero. Superbement alléchant!


Download (depositfiles.com)

Replic No.126


La réaction ne s'est pas fait attendre de la part des meilleurs fabricants de décalcomanies pour la nouveauté marquante de ce début 2002. puisque voici quatre planches pour ce fameux "109 G" Hasegawa. La n°36. intitulée avec humour 'les montures du chevalier blond", sous titrée les Bf 109 G-6 d'Eri-ch Hartmann, comprend quatre appareils avec verrière "Erla" ou classique, avec ou sans màt d'antenne, dérive haute ou standard. Côté camouflage, les trois premiers sont classiques : RLM 74/75/76, avec des zones plus ou moins assombries, et le dernier est proposé avec un camouflage hivernal blanc. Côté marquages, les amateurs de sujets colorées sont gâtés puisqu'il y a les célèbres tulipes noires liserées de blanc sur le nez, du jaune sous les saumons d'aile et le capot-moteur, sans oublier la bande de fuselage appliquée seulement en-dessous. Sur chaque avion on retrouve un petit cœur rouge sous le cockpit avec une inscription différente, et une flèche blanche ou jaune qui le transperce.


Download (depositfiles.com)

Replic No.152


Pourquoi avoir choisi de vaporiser quatre couches de vernis brillant en lieu et place de ce que préconise la notice livrée avec les notices Aclad ? Comme tout le monde j'ai commencé à suivre ce qu'indiquait la notice en vaporisant une sous couche acrylique Aclad brillante Je me suis aperçu que les peintures brillantes gommaient pas mal les fins détails des lignes de structure et du relief dû au fait que le vernis accompagné des pigments provoquaient une surépaisseur trop importante à mon goût si il n'était pas suffisamment dilué et provoquait aussi l'effet peau d'orange qu'il était difficile de faire disparaître. Avec un peu plus de dilution, c'est la teinte qui perdait de sa brillance et tirait vers un satiné-mat. J'ai donc opté lors d'un essai personnel ma méthode décrite ci-dessus. Le vernis bien sec ce lustre plus facilement que les peintures acryliques brillantes grâce au Compound Tamiya.


Download (depositfiles.com)

Replic No.153


Contrairement à ce que pourrait faire penser l'illustration de la boîte Verlinden. vous ne disposez pas de tout ce qui est montré... plateforme, avion, chariot de démarrage, mais bien sûr, un petit encadré précise ce que contient la référence (cf. photo). Les pièces sont très proprement moulées; et c'est une constante chez la marque belge exilée aux Etats-Unis. Seuls les accessoires fournis demandent une préparation (couper la carotte de moulage) : bidons, table, et boîte à outils. On le voit, un orifice consolide la fixation du plan incliné qui vient se caler dans une épaulement. Pour mettre en ceuvre ce diorama (presque tout fait !), vous n'aurez besoin que d'un peu de peinture... Néanmoins, la présentation de l'illustration étant bien attrayante, nous n'allons pas «chercher midi à quatorze heures», et refaire la même chose. Dans un premier temps choisissez une plaque.


Download (depositfiles.com)

Replic No.154


5 pièces en plastique thermoformé. Pour ceux qui souhaitent une présentation originale pour un chasseur de la Luftwaffe, la firme allemande Airmodel a produit récemment une plate-forme de compensation pour réglage des compas. Un tel système était construit sur les bases de la chasse allemande. Il avait pour but le réglage des compas des chasseurs en les plaçant sur une plateforme tournante, avec une rampe permettant de placer l'avion à l'horizontale. La plateforme était en bois pour avoir une ambiance magnétique neutre. Le modèle est thermoformé. Pour ceux que ce type de maquette thermoformée effraie, rassurez vous, il n'y a que cinq pièces de formes très simples à découper. Il suffira de poncer les petits plots (traces des évents à vide). Bref, peu de travail ! La maquette est formée d'une grande plaque (300 x 230 mm) portant la cuve, de la plateforme, et de la rampe (en deux pièces chacune).


Download (depositfiles.com)

Replic No.155


Si vous n'avez pas envie de construire une maquette de Tupolcv SB, sans doute ce livre vous fera-t-il changer d'avis... Il retrace la carrière du bimoteur avec une richesse iconographique qui nous montre de nombreux détails des différentes versions. Né à la fin des années trente, on suit son développement décrit de façon technique. Puis, viennent les chapitres sur sa vie opérationnelle : la guerre d'Espagne avec de nombreux témoignages (républicains et nationalistes), son utilisation en bombardier léger et pour la reconnaissance, sous les couleurs tchécoslovaques (ce qui nous vaut de beaux détails techniques), dans la Luftwaffe, en Slovaquie, Bulgarie, Chine, Pologne. On le découvre aussi aux couleurs finlandaises, bien sûr abondamment sous l'étoile rouge pour ''la grande guerre patriotique", et l'on apprend que la France s'intéressa à l'avion.


Download (depositfiles.com)

Junyo Class Aircraft Carrier


JUNYO został pierwotnie zaprojektowany jako liniowiec pasażerski KASHI-WARA MARU. W projekcie jednakże uwzględniono możliwość przebudowy jednostki na lotniskowiec, o czym faktycznie zdecydowano w lipcu 1940 roku - jeszcze w trakcie budowy. Wraz z bliźniaczym HIYO (ex IZUMO MARU), okręty były pierwszymi japońskimi lotniskowcami z kominem wyprowadzonym w górę ponad nadbudówkę. Pierwszą akcją JUNYO był udział w ataku na Aleuty w czerwcu 1942 roku. Okręt uczestniczył także w Bitwie koło Santa Cruz (22.10.1942 r.), gdzie jego samoloty przyczyniły się do zagłady amerykańskiego lotniskowca USS HORNET. W dniu 5.11.1943 r. JUNYO został storpedowany przez łódź podwodną USS HALIBUT. Po naprawie uszkodzeń okręt wrócił do służby. Wziął udział w Bitwie na Morzu Filipińskim. W jej trakcie (20.06.1944 r.) został trafiony dwukrotnie bombą lotniczą w rejon komina. Naprawy przeprowadzono w Kure. W dniu 8.12.1944 r. JUNYO został storpedowany przez USS REDF1SH (lub USS SEA DEVIL). Lotniskowiec o własnych siłach dotarł do Sasebo, gdzie pozostał do końca działań wojennych.

Download (depositfiles.com)

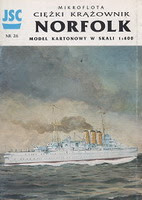
Heavy Cruiser HMS Norfolk


Pamiętając wyścig zbrojeń morskich sprzed I wojny światowej, mocarstwa morskie postanowiły po wojnie ograniczyć i kontrolować budowę okrętów wojennych, w tym krążowników. Pierwsza z konferencji dotyczących zbrojeń na morzu - waszyngtońska z 1921 roku - ograniczyła wielkość krążowników do 10 000 t wyporności standardowej, a uzbrojenie główne do 203 mm. Ponieważ mocarstwa postanowiły budować okręty o największych dopuszczalnych parametrach powstała nowa klasa okrętów; tzw. krążowniki 'waszyngtońskie', o wyporności 10 000t i uzbrojone w ok. 8 dział 203 mm. Aby zachować dużą szybkość i zasięg (cechy typowe dla krążowników) trzeba było zredukować ich opancerzenie.

Download (depositfiles.com)

Replic No.156


Premier monoplan â train rentrant à avoir équipé la Regia Aeronautica, le Fiat G-50 fut tout sauf une réussite. Ayant commencé sa carrière à la fin de la guerre d'Espagne, il fut engagé sur tous les fronts avec plus ou moins de succès selon les qualités de l'adversaire du moment. Ainsi participa-t-il à la Bataille d'Angleterre sans jamais voir le feu, fut transféré d'urgence des brumes de la Belgique au soleil brûlant de Libye, combattit contre les PZL 24 grecs et les Hurricane britanniques dans les deux du Péloponnèse, assura la défense des cités italiennes en attendant mieux, bref, il est le représentant le plus parlant de la carence quantitative et qualitative avec laquelle l'Italie mussolinienne entra en guerre. Nino Malizia est " un vieux soldat " et au cours d'une longue vie passée à rechercher des témoignages de survivants ayant volé sur le "Freccia", il est parvenu à créer un récit vivant, parfois poignant, souvent critique des conditions d'utilisation de ce chasseur.


Download (depositfiles.com)

Basic Aviation Modelling


One of the unavoidable steps in the construction of an aeroplane kit is the painting of the interior. This means that all visible cockpit walls, wheel wells and fuselage areas where windows give an inside view must be coated in an appropriate colour. In the case of this P-38 Lightning and other American aircraft of the Second World War period a special coating known as zinc chromate primer was applied as an anti-corrosive. This had two distinct casts, yellow and green both being quite bright. Some modellers prefer to grey down zinc chromate so that it does not stand out although most primed areas of the model will be hidden by interior fittings. Dry brush again helps to give some effect of wear and to bring out detail on black-painted fittings. On models of aircraft with tricycle landing gear there will invariably be a tendency for tail sitting. This is overcome by adding weight into the extreme nose or engine nacelles - if there is sufficient space.


Download (depositfiles.com)

Model Magazine International 06-07 2003


First deployed in 1983, the versatility of HUMVEE is reflected in the AM General trademark acronym that is its name, High Mobility Multipurpose Wheeled Vehicle. Employing a V8 diesel engine capable of 150hp output as well as an advanced 4WD system, automatic transmission, and power steering, the Humvee demonstrated incredible mobility and versatility during its deployment in the Panama Conflict, the Gulf War, as well as conflicts in Bosnia and Kosovo. Depending on its variation and employment type, the Humvee can serve as a cargo or troop transport vehicle, weapon employing vehicle, TOW anti-tank missile or ground-to-air missile employing vehicle, rescue vehicle, and more. The M0125 could be fitted for armament (M2 or M60 machine guns, as well as MK.19 grenade launchers), but unlike some of its armed predecessors, the M1025 featured a metal roof in place of a canvas roof and door. Currently, this vehicle plays an indispensable role in the U.S. Military. Tamiya presents a 1/35 scale model of the M1025 Humvee using the latest in slide molding technology to render a kit with never before seen precision and authenticity. Door, rear hood, and roof hatch come as separate parts to allow for various assembly options. Parts for two types of vents on front hood and side mirrors, as well as parts for replication of air-intake and muffler layoff characteristically employed by the Humvee deployed with the US Marines are also included in the kit. Parts for recreation of Mk.19 grenade launcher, M2 heavy machine-gun (newly molded), and ammunition cases are featured in kit. Rubber tires enhance realism down to the tread marks. Two figures are included- driver and gunner with full-gear, helmet, and detailed facial expressions.

Download (depositfiles.com)

Military in Scale 05 1994


The assembly is swift to say the least. The cleaning up that is necessary on the components is negligible, taking minutes rather than hours. The single piece trailer chassis is superbly cast, especially when you consider the complexity of the castina. The first items to be added to the chassis were the two wheels, which once again were nicely cast and contained beautiful tread detail. The two support jacks were added next, but with hind sight I think I would have left these until last, as they had a tendency to be wiped off as the rest of the assembly progressed. A small hole was drilled through the tow hitch to accommodate the metal rod handle and the rod for the hand brake linkage was also added. The next items to be added were the mud guards, but you will have to ensure that the correct ones are fitted from side to side, due to each one having a different light fitting to the other. At this point it is probably best to spray the chassis and paint the tyres, otherwise access is restricted when the trailer body is in place. For the purpose of the assembly photographs, I dry fitted the trailer body, removing it later for painting.

Download (depositfiles.com)

FineScale Modeler 09 1990


The basic kit. The Panther Ausf A is an important vehicle to modelers of German WWII armor. In my opinion, Tamiya's version is its worst tank kit; the turret and mantlet are especially inaccurate. Yet there are few alternatives. Nichimo's Ausf G also suffers from scale inaccuracies, and to buy Gunze Sangyo's kit just to use the turret, road wheels, and tracks is too costly. So a conversion of the Tamiya kit is the path I chose. Zlmmerit Zimmerit was applied by the manufacturers to all German tanks and assault guns between early 1943 and autumn 1944. Most of the Panther Ausf A tanks would have received this treatment. Later in the war, as Germany's tactics changed from offensive to defensive, the antimagnetic coating became unnecessary. Zimmerit in miniature can be a nightmare for modelers. I use two techniques, although I prefer the method described below for most of my armored vehicles. For vehicles with a lot of broad surface area or little cast-on detail, I use Milliput epoxy putty; for smaller tanks (Panzer IV and smaller) I use a hot knife. Often I combine the two techniques.

Download (depositfiles.com)

Model Magazine International 04 2007


Let me begin this article by stating I don't profess to be an expert on the M4 Sherman. While other modellers have made a veritable career of understanding the subtle nuances between each and every Sherman variant, I'll admit I have not. But when approached to build this model essentially straight from the box, I jumped at the opportunity - not being tasked with modifying and correcting flaws and oversights seemed reasonable and well within my limited knowledge of the subject. I'm sure that despite how accurate this kit initially appears, modellers will most certainly find areas to embellish and improve. For the sake of this article, the scope remains a simple one - to enjoy the experience building the kit for what it offers. The Sherman Mk.III was based upon the American M4A2 and Dragon has chosen to release this variant with great alacrity following their previous M4A2 Tarawa kit. Chock-full of detail, Dragon has provided no less than 463 grey styrene parts. 22 clear parts, a fret of brass photo-etch, metal tow cable and a beautiful pair of DS vinyl tracks in the ample box. Granted, many parts will not be required for this build but will do wonders for the spare parts bin. Many exceptional reviews of this kit are available in print and on the internet, so I won't reiterate their findings here. Using the outstanding Echelon Fine Detail sheet ATL352002 I chose to portray "Barford St. Martin", a vehicle from A Squadron, 2nd Troop which operated in Syria in 1943. This decision was based on several factors. With a three-piece transmission cover, cast bulges for the hull crewmen and wings on the rotor covers, that vehicle not only met the appropriate physical criteria, but with 15 yellow-scripted characters in the name it simply offered a bit more colour to the model!

Download (depositfiles.com)

Military in Scale 08 1994


FIGURINES AND ACCESSORIES: Some of the figurines had to undergo major horrific surgery in order to obtain realistic figurines. In nearly all cases I had to change the heads of the plastic figurines with ones from after-market products, which are much better carved and have more lifelike expressions. The dead female VC lying in the bushes is a case in fact. Her feet, hands, arms, legs and head all received alterations, or transformations of one sort or another. The metal and resin figurines merely changed heads for a "different look" or arms for a different pose. For the most part it was only a matter of exchanging between the individual pieces. Under wildlife; the piglet is from Tamiya as are the birds (chicks with leadfoil tails and sanded down breasts)in the nest( putty on the head of a Bic rolled in and then in paint brush bristles! photo 25). The foreground and the serpent(a bongare) coiled Milliput. Special weapons came from a Verlinden Soviet small arms pack, Tamiya ACAV and Command sets. The shotgun shells on the floor of the boat and their bag were scratched, as was the pirates flag a bit of creative fantasy. The ration boxes are from Pre-Size/SMA.

Download (depositfiles.com)

FineScale Modeler 11 1997


The early World War II SBD-3 Dauntless dive bomber was the star of the heroic battles of Coral Sea and Midway. Along with this kit, Accurate Miniatures has released a late-war SBD-5, and is planning a pre-war Marine SBD-1 for production. External detail is mostly fine recessed panel lines with realistic raised-rib, fabric-covered controls. Even the tiny clips that held canvas engine and canopy covers are there. The kit features an excellent reproduction of the R-1820 Cyclone radial engine, and a cockpit interior that has everything, even a relief tube and a flare gun! You can spend hours building and painting the interior, but when enclosed in the fuselage much of it can't be seen. Aftermarket interior sets will be superfluous, except that phototeched belts or homemade ones would be better than the decal seat harnesses provided. With any SBD kit, the first question modelers raise is whether the dive flaps are perforated. Yes, and the dive-flap actuators are also included. You can pose the brakes closed, bottom down (for take-off and landing), or full open. Unfortunately, my samples dive flaps and actuators were warped.

Download (depositfiles.com)

FineScale Modeler 07 1998


Anew kit in 1/32 scale is rare enough, but I couldn't wait to grab this P-40, my favorite aircraft. CraftWorks' first kit features excellent resin castings and outstanding cockpit detail. Its a complete kit, not a conversion for the old Revell P-40E. The major parts are well cast in polyurethane resin. The quality of the cast-metal landing gear is not as crisp as the resin, though. Many detail parts tor the cockpit interior are photoetched brass, and this includes canopy framing! CrattWorks' instructions are comprehensive, with 27 illustrated steps, seven photos, and decaling diagrams. The decals are top-notch and provide markings tor three American Volunteer Group "Flying Tigers," one British plane, and one U.S. Army Tomahawk. This model is not a weekend project. Despite the high quality of the castings, overall fit is only fair. Follow the instructions to the letter; they take you by the hand to solve many assembly problems. Each step features painting directions. Steps 7 through 14 cover the cockpit interior. I had to sand the hack sides of the interior walls before inserting them into the fuselage. The interior provides contest quality right out of the box - even the armored glass plate is provided inside the windscreen.

Military in Scale 09 1994


I first saw this model when it was shown at Euro Militaire and was highly impressed by the attention to detail and quality of the model, since then the company that actually produced the kit has gone through a few changes and the Tiger 1 Transport Railcar is now manufactured by The Tank Workshop from the U.S.A. The 1/35 scale resin kit does not include the Tiger 1 nor does it include the transport tracks that were shown on the display model, but research into the use of the this type of railcar revealed that it was common practice to transport Tigers with their full width combat tracks still fitted when the routes did not involve passing likely obstructions such as tunnels and bridges. With this in mind I built one of the Tamiya Late Tiger 1 models straight from the box, adding just the Zimmerit anti magnetic coating and Milliput covers for the main gun and the hull mounted machine gun. The quality of the resin castings is very good, no air bubbles to speak of and holding an extremely fine level of detail. The parts were all warp free with the only criticism I could really level at the castings being the size of some of the pouring blocks. On some of the components these were a bit too big for my liking and took a long time to remove. Some were able to be removed using a razor saw whilst others could not and needed to be sanded down. Other components were produced in such a way and with such attention to detail that hardly any cleaning up was necessary.

Model Magazine International 08-09 2003


The word 'Humvee' is on the way to become a generic name, rather like its predecessor, the WW2 Jeep. Both words are adapted from abbreviations - GP (General Purpose) for the Jeep, and much less catchy HMMWV (High Mobility Wheeled Vehicle) for the Humvee. The civilian version sold by AM General is called Hummer, perhaps a little easier to pronounce! The Humvee entered service with the US Army in 1985, and has seen extensive use in action around the globe since then, including both Gulf Wars and the Balkans - true tests of the vehicle's abilities. Many versions have been manufactured, from basic troop/cargo carriers to specialist adaptations such as the anti-tank M966 TOW launcher and Avenger antiaircraft system. Tamiya have offered a Humvee in the Military Miniatures Series, the M242 with Bushmaster cannon, but this was basically the Italeri kit with modifications, and was showing its age a little. Now we have a completely new kit of the Humvee, and a different version in the form of the M1025 armament carrier. The model is broken down into the main structural components rather like the real thing, with individual ladder chassis, suspension, body tub, hood and roof. No engine is included, so in the style of Tamiya's 1:24 cars we have sump and gearbox detail visible from below, plus a radiator that can be seen from above, but nothing in between. This undoubtedly keeps the kit price down, but it would have been nice to have a powerplant in the style of the Jeep and GMC truck. I am sure that aftermarket producers will follow up with a resin engine fairly soon.

FineScale Modeler 1998 09


The instructions include a brief history, 14 assembly steps, and a Tamiya color list. One problem here: The top color is described as USAF light gray; it should be Light Gull Gray (FS 36440). Parts fit is excellent - sometimes even too snug. The main part of the fuselage is split horizontally with the upper and lower wing panels, while the forward fuselage is split vertically. This seam inside the small vent on top of the turtle deck behind the canopy is difficult to fill. followed the instruction assembly sequence, but left off the stores, landing gear, and canopy until all the painting and decaling were done. The directions to paint gunmetal on the turbine fan on the front of part A33 in step 5 comes too late, as you've already painted that part white in step 4 - a reminder to study the plans carefully before beginning. It you choose to told the wings and raise the slats, you must cut a few tabs from the wings. The tail-bumper wheel can be posed down to keep the model on its nose gear.

Download (depositfiles.com)

Model Magazine International 10-11 2003


The Olive Green camouflage colour was chipped first with the Sand colour, then with the Russian Green. Some of the Sand coloured chips have Russian Green chips underneath them. All of the chips & scratches were applied to heavy use areas using a very fine brush. The final chip colour was a dark Rust colour, which was applied just on the corners & edges of parts. This process was very tedious and time consuming, but necessary for realism. Now the model was very dynamic with colour, but still not quite realistic to me. The final weathering step was to make it dirty. The Egyptians used their SA-6 in a desert environment, and they used it heavily during the war. When the missile fired, it kicked-up an enormous amount of dust. When the vehicle drove at speed, it also kicked-up lots of dust. So I added lots of dust! This was done by first airbrushing a very thin layer mixed from Tamiya Buff & Desert Yellow overall. concentrating more on the lower areas around the wheels & tracks, and also the rear plate. At first this frightened me because it removed the harsh richness of the colours I worked so hard to apply before. Later, after looking at it for an hour or so, I got adjusted to the appearance. Finally I added more concentrated dust to the corners & recesses along the upper surfaces. This was done by mixing MIG Productions pigment colours until I found the shade I was looking for, then mixing it with some water. I brushed this 'wash' into the areas that I needed concentrated dust. In less than an hour all dust was dry. Naturally some dust was deposited in undesirable places, but it was easily blended out with a clean, dry brush. Finally, a few heavy use areas were lightly rubbed with graphite to bring a polished steel effect. As the SA-6 was a new vehicle in Egyptian service, I tried not to overdo this.

FineScale Modeler 10 1998


The instructions consist of a short narrative, rough exploded-view drawing, tail-marking sketches, and several drawings that show details of the landing gear, seat, and antennas. Study the instructions and evaluate the work needed on the parts. I treated the plastic parts as though they came from a vacuum-formed kit - I sanded the mating surfaces of each on 320-grit wet-or-dry sandpaper. Once the edges were smoothed, the fit was generally good. However, I had to fill a large gap on a short section of the top fuselage seam. The intakes fit poorly, and the structure of the main gear well won't fit in the fuselage unless you enlarge the bay opening. There are no locators on the wings tor the super pods, so study drawings and references before gluing them. The noses of the super pods on the U-2R I modeled had large flattened areas not featured in the parts. I carefully leaned the pods against a clothes iron to produce the flat spots, then cleaned up the edges with sandpaper. To ensure the model would sit on all tour gears, I super glued the main and tail struts and wheels in place, drilled holes in the wings, inserted the outrigger "pogos," then tack glued the wings to the fuselage while resting the model on a flat surface. When all was set, I reinforced the wing/ fuselage joints with super glue, which also filled the gaps. The vacuum-formed canopy fit well. The antenna farm so distinctive of late U-2s is not provided, but the instructions' diagrams tell part of the story. I borrowed a 1/48 scale resin antenna set from Cutting Edge, laid the parts on a reducing copier, and shot a 66.7 percent copy. I used these shapes to make antennas from .015" sheet styrene, then followed the Cutting Edge instructions to locate the antennas.

Download (depositfiles.com)

Model Magazine International 03 2005


I've always figured jumping around the instruction sheet keeps things interesting when constructing a model kit. However, I did follow standard operating procedures and started with the cockpits. The Cutting Edge instructions for the cockpit set tell you to remove the fuselage float and the kit cowling, which is fine. Just make sure you are actually going to use the replacement resin sets for those parts before following the directions perhaps a clever ploy to get you to buy the two other resin sets..? You will have to remove all the bumps and such from inside the fuselage, as well as the moulded-in instrument panel. Obviously, test fitting is the name of the game here, with two cockpit tubs and two bulkheads to properly align. The excellent Cutting Edge instructions clearly lead you through the procedure. One place I did deviate from the instructions was the attachment of the rear front cockpit bulkhead. The instructions would have you first glue the bulkhead into one-half of the fuselage and then build onto it. I felt doing this would eliminate any possibility of later adjustment of the tub position, so I attached the rear bulkhead to the tub and glued the assembly in as one piece. I felt the instruction for placement of the resin instrument panel to be a bit vague and decided to attach it to the front bulkhead. However, it turned out this caused the instrument panel to be set back a few millimetres too far. I would recommend placing spacers between the bulkhead and the instrument panel in order to get the proper placement.

Download (depositfiles.com)